
No products in the cart.
Return To ShopHow To Replace the Battery In Your iPhone 13

If your iPhone 13 isn’t holding charge like it used to, it might be time to consider a battery replacement. Over time, lithium-ion batteries naturally lose capacity, causing your phone to drain faster or shut down unexpectedly. Here’s a complete step-by-step guide on iPhone battery replacement—from preparation to finishing touches.
Step 1: Check If You Really Need a Replacement
Before jumping into the repair, check your battery health.
- Go to Settings → Battery → Battery Health & Charging.
- Look at the Maximum Capacity percentage. If it’s below 80%, your iPhone battery is degraded and should be replaced.
If your phone feels warm often, drains fast, or charges slowly, these are also strong signs it’s time for a new battery.
Step 2: Gather Your Tools
To safely perform an iPhone battery replacement, you’ll need a few essential tools:
- Pentalobe screwdriver (for the bottom screws)
- Suction handle or iPhone opening tool
- Plastic spudger
- Tweezers
- Replacement battery compatible with iPhone 13
- Adhesive strips Make sure you work on a clean, flat surface and power off your phone before starting.
Step 3: Remove the Display
- Remove the two pentalobe screws near the charging port.
- Use the suction handle to gently lift the screen just enough to insert a plastic prying tool.
- Slowly work your way around the edges. Be patient—rushing can damage the display cables.
- Once loosened, open the iPhone from the left side, like a book.
Step 4: Disconnect the Battery and Screen
Inside, you’ll see a metal shield covering several connectors. Use a screwdriver to remove the shield screws.
- Disconnect the battery connector first to avoid short circuits.
- Then, disconnect the display connectors.
Now your screen and battery are safely disconnected.
Step 5: Remove the Old Battery
The iPhone 13 battery is secured with adhesive strips.
- Use tweezers to grab the white tabs at the bottom of the battery.
- Gently pull them out one by one—slowly and steadily.
- If a strip breaks, carefully warm the back of the phone with a hair dryer to loosen the glue.
- Lift the battery out once all strips are removed.
Step 6: Install the New Battery
- Place the new adhesive strips in the same location.
- Align the new battery perfectly with the connectors.
- Press gently to secure it in place.
Reconnect the battery and display connectors, then reattach the metal shield.
Step 7: Reassemble and Test
Close the phone carefully, replace the pentalobe screws, and power on your iPhone 13. Check that the screen responds normally and your new battery charges properly.
Final Thoughts
Replacing your iPhone 13 battery can bring your device back to life, restoring smooth performance and longer battery life. However, if you’re not confident doing it yourself, professional help is always the safest option.
If you’re in Florida and prefer expert hands to handle it, consider finding a trusted iPhone battery replacement near Orlando, FL—you’ll save time, avoid risks, and get your phone running like new again.


About author
Related posts
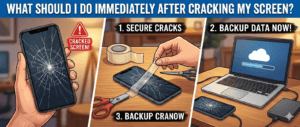
Cracking your phone screen is stressful, and the first moments after it happens are crucial. Taking the right steps immediately can prevent further damage, save... Continue reading

Living in Orlando, you’re no stranger to the rainy season’s sudden downpours and high humidity. Whether you’re caught in a storm near Lake Eola or... Continue reading

Add comment